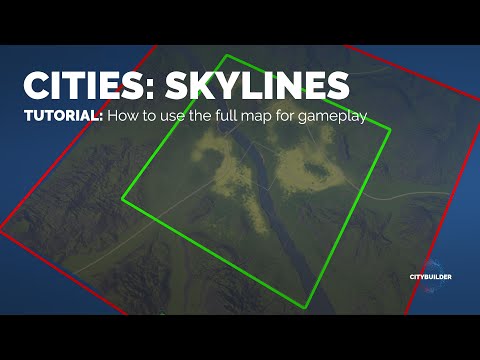
Realistic maps in Cities: Skylines start with real terrain: download heightmap data for a location, clean it up in an image editor, paint the water areas, export it as the heightmap and load it in the Map Editor. A street map of the same area at the same scale becomes an overlay (Overlayer 2 mod), so you can trace the real road layout in-game.
準備 · What you need
- terrain.party ↗ — free real-world heightmap downloads
- Google Maps ↗ — street layout for the overlay
- Adobe Photoshop — or any image editor with layers (GIMP, Affinity Photo)
- Overlayer 2 ↗ — shows the street map as an overlay in the Map Editor
- 81 Tiles → — optional — to build on the whole map
Realistic maps are where every real-world rebuild on this channel starts. This is the complete process — from terrain data for (almost) any location in the world to a street-map overlay you can trace in the game. The following tutorials split it into faster single steps.
The workflow at a glance
| Step | Tool | Result |
|---|---|---|
| 1. Download terrain | terrain.party | Raw height data for the area |
| 2. Build the road map | Google Maps + image editor | A street map at the same scale |
| 3. Fix the heightmap | Image editor | Clean shores, flat water, smooth terrain |
| 4. Import | Map Editor + Overlayer 2 | Terrain and overlay in the game |
1. Download real terrain
Find your location on terrain.party, size the selection box to the map area and pick the best scale — a box that is too big flattens mountains, one that is too small cuts off the surroundings. Export the data, and take a base screenshot of the selection box: it tells you exactly which area your street map has to cover.
The dedicated heightmaps tutorial goes deeper into choosing the best data set.
2. Build the road map
Open the base screenshot in your image editor and use it as the base layout. Take Google Maps screenshots of the same area, scale them until the coastline and rivers match (8:41) and stitch them together. Lower the opacity of the street layer to check the alignment, then export the road map as a PNG.
For a quicker version of this step, see map overlays and the faster overlay method.
3. Improve the heightmap
Raw elevation data rarely has clean water. In the image editor:
- Improve shores and river banks so the water edge is crisp.
- Select all water areas (using the street map as a guide) and fill them with one low value, so rivers and the sea become flat.
- Smooth the remaining terrain and export the heightmap.
4. Import into Cities: Skylines
Copy the road map into the game’s overlay folder, start Cities: Skylines and check that Overlayer 2 is enabled. In the Map Editor, load the heightmap, then load the map overlay. Finish by smoothing the shores with the terrain tools.
Before you start
- Pick a place with interesting terrain and water — valleys, coasts and rivers make the best maps.
- Think about map size. Real places are big; 81 Tiles lets you build on the whole map.
- Expect a few hours for the first map. The JAPAN map series shows about five hours of map editing for one finished map.
Video chapters
- 0:00Intro
- 1:55Using terrain.party
- 2:57Picking the best scale
- 4:15Exporting data from terrain.party
- 4:48Using Google Maps
- 5:42Base screenshot in terrain.party
- 5:52Using your image editing program (Photoshop)
- 6:27Using the screenshot as a base layout
- 8:41Finding the right scale
- 9:02Easy overlays for better positioning
- 11:37Full road layouts (fast forward)
- 12:08Finished road map
- 12:52Changing the opacity
- 13:13Exporting the road map as PNG
- 14:11Improving the heightmap data
- 16:02Improving shores and river banks
- 17:36Selecting all water areas (fast forward)
- 20:33Filling the water selections
- 23:16Improving the heightmap data
- 28:27Exporting the heightmap
- 29:39Copying the road map to Cities: Skylines
- 31:37Starting Cities: Skylines
- 32:14Checking the Overlayer 2 mod
- 32:54Launching the Map Editor
- 33:41Loading the heightmap data
- 35:57Loading the map overlay
- 37:53Smoothing the shores
- 39:59Outro
Clicking a chapter starts the video above at that point.
Related videos
- Realistic Heightmaps and How to improve these - JAPAN Series (18:49)
- (Google) Map Overlays - Use realistic Street Maps - JAPAN Series (11:48)
- Faster Map Overlays - Use realistic Street Maps - JAPAN Series (17:18)
FAQ
Can I make a map of my own town in Cities: Skylines?
Yes, for almost any place on Earth. Download real elevation data for the area, turn it into a heightmap and load it in the Map Editor. A street map of the same area becomes an overlay to trace the roads.
Why is my real-world heightmap so flat?
The height scale is wrong for the area, or the data set is too coarse. Compare the data sets and pick the one with the most visible detail, then adjust levels in the image editor.
What if terrain.party is offline?
Use another heightmap service that exports 1081×1081 16-bit PNGs for Cities: Skylines. The rest of the workflow stays the same.